Wednesday, April 20, 2016

How to put your subject in another background in Photoshop

In this post we're moving our subject and placing it against another background.

I start with 2 pictures:


The goal is to move the girl to the other background (image 1) and make it look realistic. First of all, I've got to cut out the girl from her original background. To do this, I open the picture and use the quick selection tool (W).

I used refine edges to improve the selection and went with output as Selection. I right clicked on the selection and chose 'Layer via cut'. Don't forget to make the background layer inactive here.  

Open the picture of the background. Select the girl and move her to the new background using the Move tool (V). I used the free transform tool (Cmd T) to scale it.

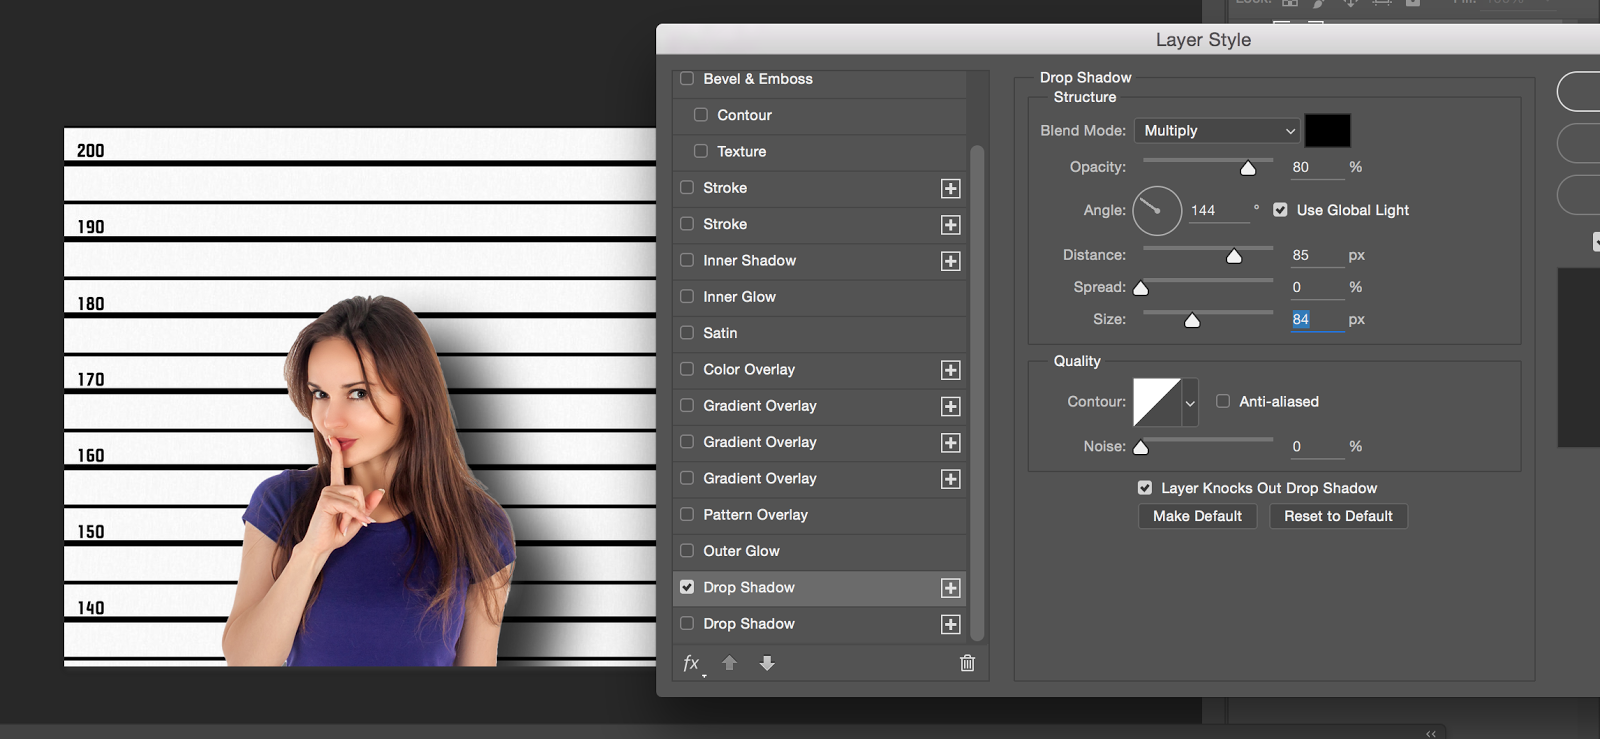
Next I created a shadow around the girl to make it more realistic. Double click on the girl in the layer panel. I chose Drop shadow. 

These are the values I used for the drop shadow. 

Last thing to do is to blur the edges of the selection of the girl with the blur tool. Merge the layers  (Cmd E) down and add some blur around the girl.

This are the basic steps to add a subject to another background. Go on, give it a go!  

Don't forget to follow us on Facebook or 500px


And have you already discovered our Facebook page Humans of the Nordic Region?

By the way, the picture I used comes from pixabay.com

No comments:

Post a Comment