Thursday, July 28, 2016

Be where the action is: Östersunds Storsjöcupen

Every year in week 27 Östersund is flooded with football players in the ages of 12-17. Youths from all over the world come to Östersund to compete in one of the biggest youth football tournaments of its kind. 

Teams from Sweden, loads of teams from Norway and even teams from as far away as Mexico and Peru are taking part. 


When shooting sports, it's of the utmost importance to be where the action is. And when shooting a ball sport, try to include the ball in your image. And don't forget the spectators.

Don't forget to follow us on Facebook or 500px


And have you already discovered our Facebook page Humans of the Nordic Region?


Monday, July 25, 2016

How to create a 360 for Facebook

Remember when I wrote about how to get inspiration? Well, just the other day I say this really cool 360 degree image and I really wanted to learn how to do it. Youtube is a great friend of mine and there I hit this really cool video from Colin Smith

He really does a great explanation on how to create a 360 degrees picture for Facebook.


In his video he used this site to change the exif date so that Facebook recognizes the image as a 360 degree picture.

Check our Facebook page to find out what our first attempt at a 360 degree picture. 


Don't forget to follow us on Facebook or 500px


And have you already discovered our Facebook page Humans of the Nordic Region?


Go where the action is

During our Norwegian roadtrip, we had the fortune of landing in the middle of the Norwegian Championships Time Trial. I guess it'll come as no surprise that we didn't hesitate to take out our cameras and to shoot some images. 

The first evening we were at the location, there was the team trial. It finished at the camping at the Saltstraumen. 

Saltstraumen is a small strait with one of the strongest tidal current in the world. It is located in the municipality of Bodø in Nordland county,Norway. It is located about 10 kilometres (6.2 mi) southeast of the town of Bodø. The narrow channel connects the outer Saltfjorden to the large Skjerstadfjorden between the islands of Straumøya and Knaplundsøya. The Saltstraumen Bridge on Norwegian County Road 17 crosses the Saltstraumen.

The last kilometer of the team time trial was challenging with crossing the bridge over the Saltstraumen to the finishline.  


The following day, our road trip took us south and we covered some of the individual time trail runs. We positioned ourselves just after one of those typical bridges. Just after the really mountainous part of the trail began. 


Road 17 is also a very popular road for bikers going to the North Cape.

Don't forget to follow us on Facebook or 500px


And have you already discovered our Facebook page Humans of the Nordic Region?


Wednesday, July 20, 2016

Introducing: the Content Aware crop in Photoshop 5.5

The latest version of Photoshop (5.5) gives us the the content aware crop. And let me tell you that it sure gives some pretty amazing results. Let's get started! 

Open Photoshop and open the image you want or need to crop.

To crop hit the C key of your keyboard. Make sure the content aware crop is selected.

Now crop the photo like you used to do it before.

Hit Enter to crop it. Photoshop will now try to fill the transparant parts. When you have a picture with skies etc it does a fab job.


When the photo has more content like buildings on the edges you might get some weird results, but with the clone tool (S) you can fix this. I think its an awesome function and very helpful. 

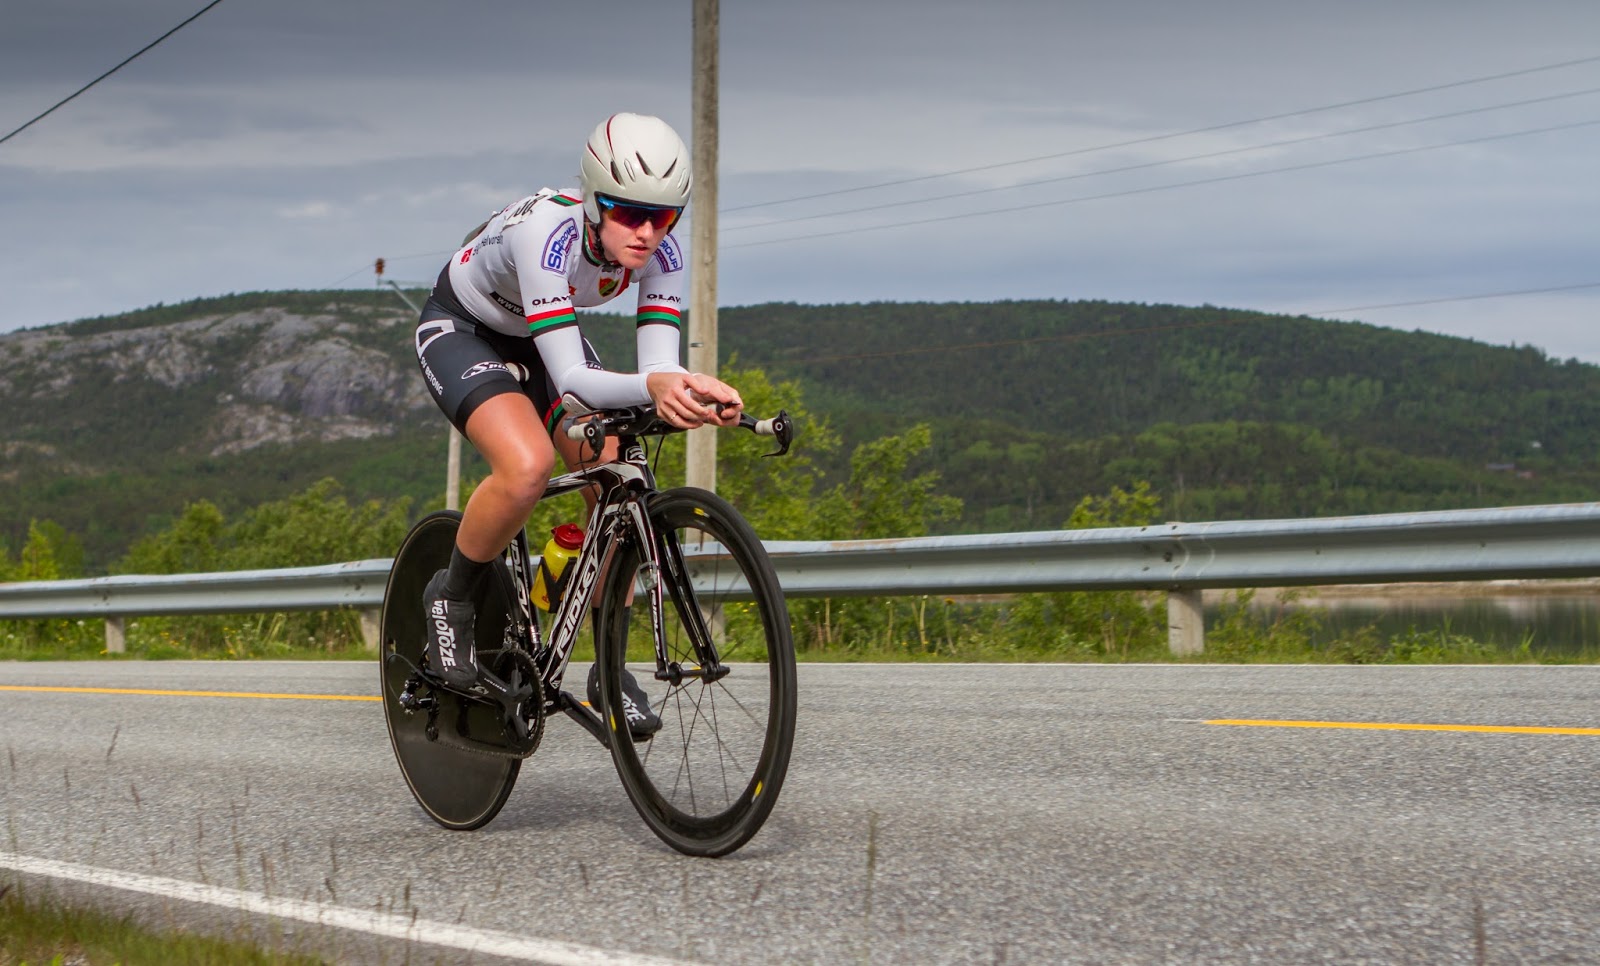
You also can use it to add more sky or more pixels to either side of your image. Let's say you want to have more space at the bottom of this picture.

Use the content aware crop to do this.
Hit enter to crop it. Because the shoes are very close to the edge of the picture, the result is a bit weird.

But with the clone tool it's easy to fix.

Another way to avoid or reduce the strange results is to use a mask. Let me show you how this works. I'll use this image: 

I crop it like this: 

Enter the weird result: part of the lamp post in the middle of the sky.  

The trick is to add a mask and paint with a hard black brush. Paint the part that seems off in the picture.

Now crop the picture again:

Voila! Now I got a much better result 

Some quick fixes and there's the end result:

Don't forget to follow us on Facebook or 500px.  

And have you already discovered our Facebookpage Humans of the Nordic Region?


Picture 1 and 3 from pixabay.com

Monday, July 18, 2016

How does the new Photoshop liquify filter work?

I know I've tried it before and maybe you too: changing a face just for the fun of it. Bigger eyes, a longer nose a wider forehead. 

Photoshop has the liquify filter that can be used for this purpose and in Photoshop 5.5 it has now become even easier to change a face. In a few minutes, your model has bigger eyes and a smaller forehead. Let's see how it works. 

Start with opening a picture with a face. Hit CMD J to duplicate the layer. 

Now open the liquify filter. 

With the 5.5 version of Photoshop, Photoshop will detect the face of the model in your picture. And with the sliders in the Face Liquify aware section it's very easy to change the face.

It's very easy but I'd say: keep it subtle and most of all: keep it natural.

Don't forget to follow us on Facebook or 500px.

And have you already discovered our brand new Facebook page Humans of the Nordic Region?


picture from Pixabay.com

Friday, July 15, 2016

How to be straight in Lightroom

It has just become even easier to straighten an image in Lightroom! 

Lightrooms latest update (6.6) has a new section in the Develop module called Transform. What's new here is the guided option.  

With this option you can straighten horizontal and vertical lines in your image. To show you how it works, I've used one of my old pictures.

Before I go to the Transform section, I checked Lens correction:

Adobe recommends to do this before you use the transformation options. After the lens correction, I opened Transformation and picked Guided.

Just draw lines on those parts of the image that you want to have straightened (horizontally and vertically). Click done to apply it to your image. Now the lines are corrected. 

Bear in mind that the result can be that you lose some information from the edges of the picture. This can be easily fixed though by cropping your image.

I find this feature pretty helpful! Especially in a picture like this with many buildings. 

Don't forget to follow us on Facebook or 500px

And have you already discovered our Facebook page Humans of the Nordic Region?


Tuesday, July 12, 2016

How to create a collage in Photoshop

Sometimes it can be nice to presen your work in a different way. Like for example as a (poster) collage. 

And you know what, it's actually quite easy to do. Check out this video to find out what steps to take. 

Or make something like this collage from just one image. Tons of possibilities to be creative! 

Don't forget to follow us on Facebook or 500px


And have you already discovered our Facebook page Humans of the Nordic Region?

Monday, July 11, 2016

How to go B/W with Silver Efex pro

There are a lot of ways to convert an image into black and white. You can use Lightroom, Photoshop or Tonality Pro from Macpun. 

But now the Nik collection is available for free and I had great fun trying out the Silver Efex Pro.

I started out in Lightroom and followed my normal workflow to edit the picture. Then I transferred to Silver Efex Pro. Photo > Edit in > Silver Efex pro


Under the copy file options, there are some important fields:

On the left side you see the presets

On the right side you can tune the image exactly the way you like it 

You can do this globally but also locally using the control points:

With Compare you get to see the difference between the edited version and the original.


So when you're done, save the image and it will be reimported into Lightroom. If so needed, it's here you can do more editing. 

Check out this video if you want to find out more.


Don't forget to follow us on Facebook or 500px

And have you already discovered our Facebook page Humans of the Nordic Region?