Presets are actually really easy to make, but if you feel you don't want to bother: there's also loads of presets available online. You can buy them from other photographers or you can use presets that are freely available. But, in case of the latter, make sure you know what you get before you install these presets in Lightroom.
I recently acquired some really cool HDR presets form Tray Ratcliff. How did I install these in Lightroom? It's actually pretty easy but they've hidden it well in Lightroom.
Most of the times you'll get your presets in ZIP files.
- So step 1 is to unzip it. These are the unzipped files from Tray.

- After unzipping you have to copy the unzipped folder.
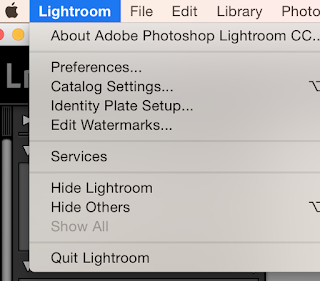
- Open Lightroom and go to Edit > Preferences on Windows or Lightroom > Preferences on a Mac.

- Open the presets tab
- Click on the button "Show Lightroom Presets Folder"

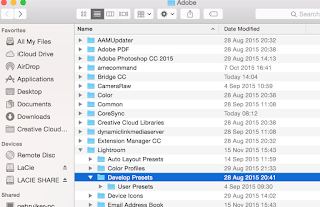
- When that Finder/Windows window opens, go one level deeper into the "Develop Presets

Have fun working with your newly installed presets!
Don't forget to follow us on Facebook or 500px. And have you already discovered our brand new Facebook page Humans of the Nordic Region?


No comments:
Post a Comment