
So how does it work:
- Open an image in Photoshop. Yep, you've got it, we're using an image from Pixbay.com again

- Duplicate the background layer. Because that way you can easily see the Before and After. Convert this layer to a smart object

- Go to Filter > Stylize > Oil Paint. Then this new screen appears:


Want to take it one step further by adding a canvas? Open the Paint bucket tool and grab a pattern. Choose a pattern.

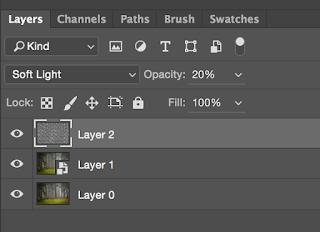
Desaturate the layer (ctrl + shift + U) and change the blending mode to Soft light. Reduce the Opacity (depending on your picture and your taste). In this case I reduced it to around 20 %.


Here it is: our very own oil painting!

No comments:
Post a Comment