Wednesday, September 9, 2015

Tutorial: reading your histogram

I know, we've talked about exposure before. And we'll probably talk about it heaps more in future posts. All because good exposure is one of the keys to great pictures. This post is about reading your histogram and getting useful info on the exposure of your picture. 

There are three main keys to good exposure, namely shutterspeed, aperture and ISO. 
So how can you tell if your exposure is good?
On the back of your camera, you can see the histogram of each photo. And, after importing your pictures into Lightroom, you can see the histogram: 

But what is a histogram actually? A histogram is the graphical representation of the pixels exposed in your picture. So the histogram can be a very useful tool to check the exposure of a picture. The left side of the histogram gives information about the blacks and shadows. The right side of the histogram gives information about the highlights and whites (bright areas of your picture). The middle is for the midtones (18% grey)


So now you know what a histogram is, but how do you use it? 
A well exposed picture has pixels that go from edge to edge. When the peak is on the left the image is actually under-exposed and when the the peak is on the right the image is over-exposed. 

Then again, like with many rules and theories in photography: there are no rights and wrongs here. So it's not wrong to have more pixels on the right or the left side. For example: when shooting a dark subject, your pixels are more on the left side (shadows and blacks). For a high key picture you want a histogram with more pixels on the right side (highlights and whites). So the outlook of your histogram depends on your subject/scene and your goal.

The histogram is quite a useful tool to help you as a photographer. So it's handy to know how it works. But most important is that you achieve what you want with the picture and don't try to shoot a perfect histogram. Use the histogram as a tool for you creativity.


Follow us on Facebook

Monday, September 7, 2015

Tutorial: composition

Every picture requires a subject. Every image is a story you'd like to portray. When planning your next shoot, these are 2 very important subjects to cover. What do I want to shoot, where, but also when. Where it comes to light, the best times are around sunrise and sunset. Shooting with the good light. But then again, you don't always have the luxury of shooting during your own preferred times and you have to make do with the light as it is. 

This post will give you some compositional ideas to use for your photography. As always: these are just tips. Don't ever forget to be creative and think out of the box. Remember, those rules out there are meant to be broken!

1. Rule of thirds
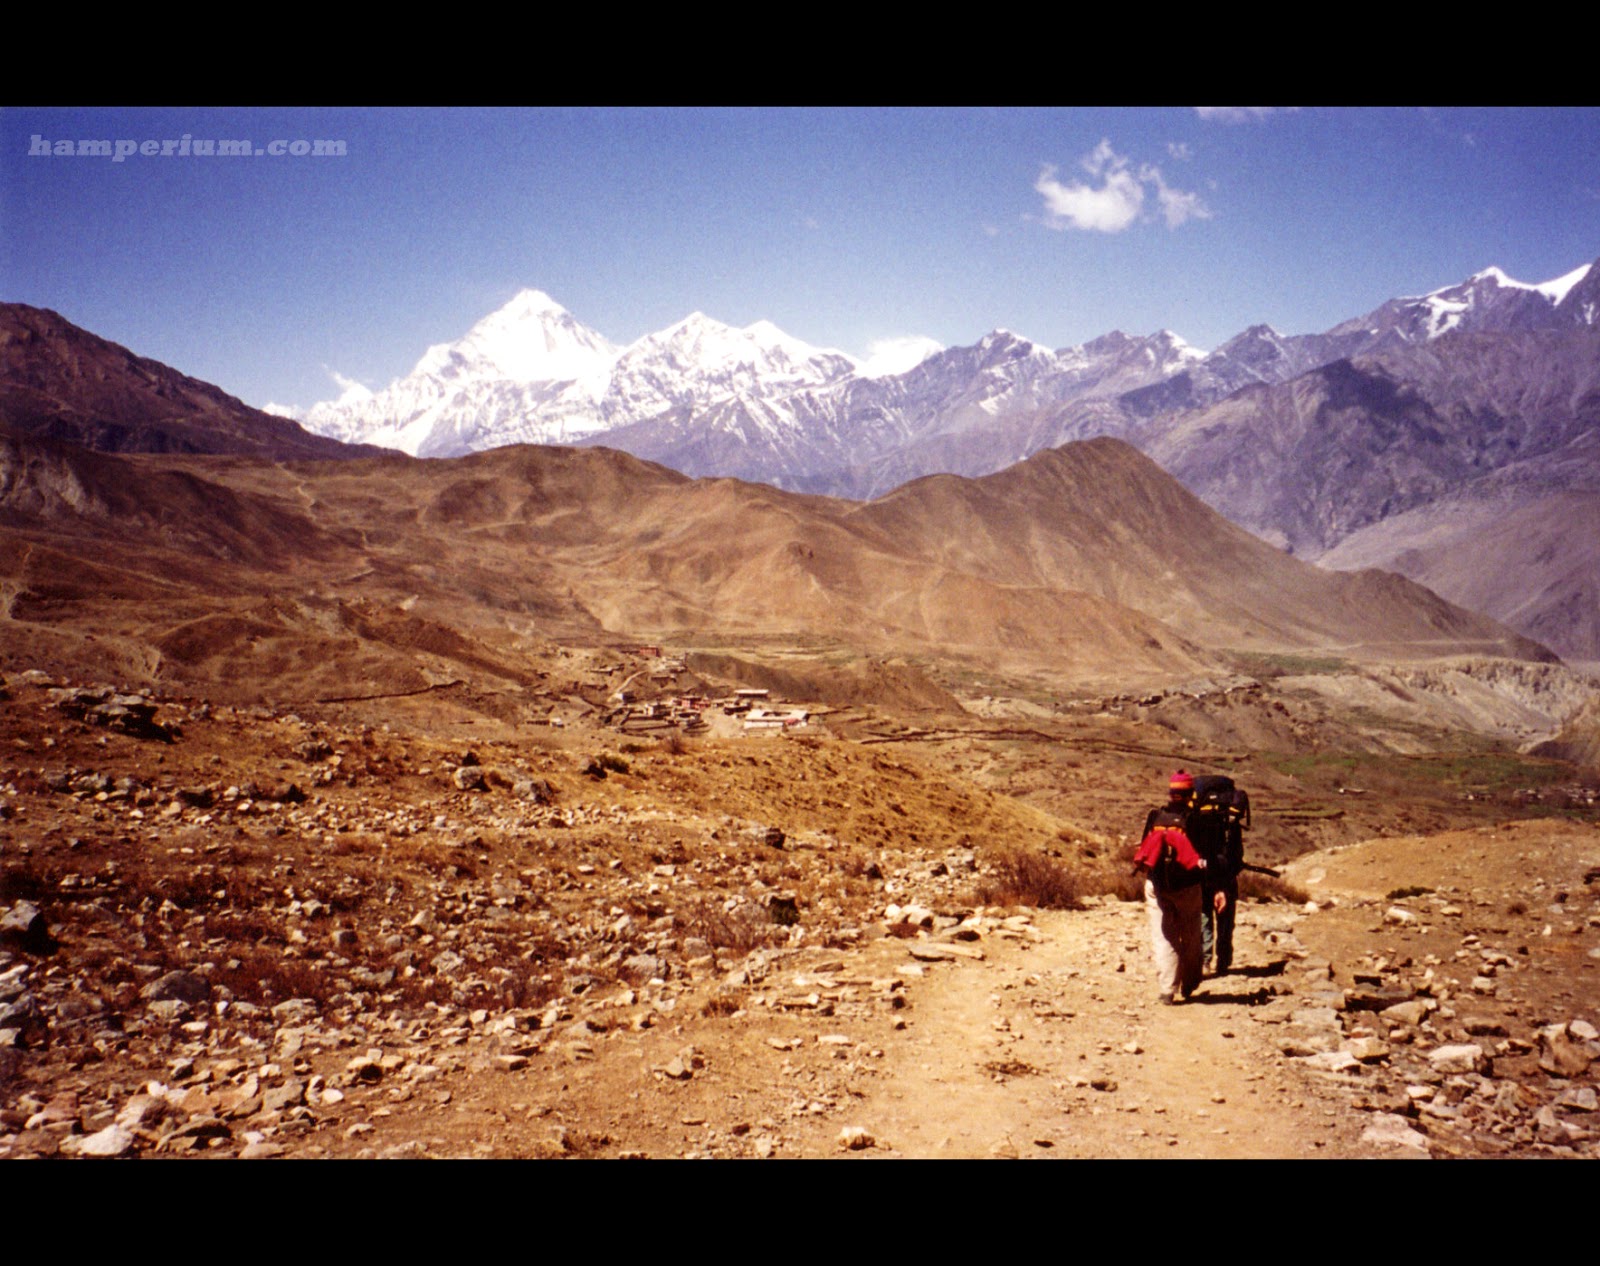
Put your subject not smack in the middle of your image but on a third to create a stronger picture.

Here's an example in an image I took when we were trekking in Nepal 
We've written about this rule before, remember? 

2. Leading lines
Leading lines are lines in an image that lead your eye right into the image.

3. Patterns
Use patterns to give your image more power. The image below shows that patterns in the sand can actually serve as leading lines. 

4. Diagonal
A diagonal line works generally good to direct the viewer's eye over the entire image

5. Reflection
Reflections can be used both to enhance the effect of your image as well as an eye-catching foreground. 

6. Foreground
In landscape photography it is of great importance to have a strong foreground, a solid middle ground and then a strong background again. The foreground draws the attention to the image. The middle and the background make sure the image is pleasing to the eye. 

7. Add a human
Add a human element in your image to add a sense of scale. 

 
The people on the images gives the viewer an idea how tiny we are in the big world. It also can give a building more power. For example the opera house in Oslo


Then again, it's not always that you'd want people in your shots when shooting buildings. Or interiors for that matter. Then it's just a question of either being very early (best chances of great light!) and/or being very patient. Or clone out the unwanted people in your image using Photoshop. 

8. Long exposure
When shooting water or for example moving clouds it's advisable to shoot with a long(er) exposure. That way, the water will turn out silkier and the clouds give the viewer a sense of movement. Make sure to bring a sturdy tripod though, because for longer exposure you sure need one. 

9. Colours
Colours draw attention. People are drawn to looking at colourful images. And in this particular image, it's the patterns in the wall that lead the eye to the colourful background. 

10. Get close (and low)
Go low and get close. When shooting landscapes don't forget to zoom to get a different image. Or crouch down for that matter. It might offer a whole new perspective when shooting from a different height. 

11. A frame in a frame
By creating a frame in your image, you lead the eye of the viewer straight into the picture. In this picture we shot through the window of a bus. It's adding depth and context and drawing the attention to a certain point. You can also use natural frame to shoot through, for example trees. 

12. Anchor points
When there's a lot going on in your picture, you can try to find an anchor point amidst the chaos. This picture was taken during the Ironman triathlon in Frankfurt. Thousands of athletes on their first meters of their swim. With a 400 mm I focussed on 1 athlete.
When getting in closer, it gives a different feeling and atmosphere.

13. Shapes
Shapes always work great to create an interesting image.  See this example of the Nescio bridge in Amsterdam

14. Shadows
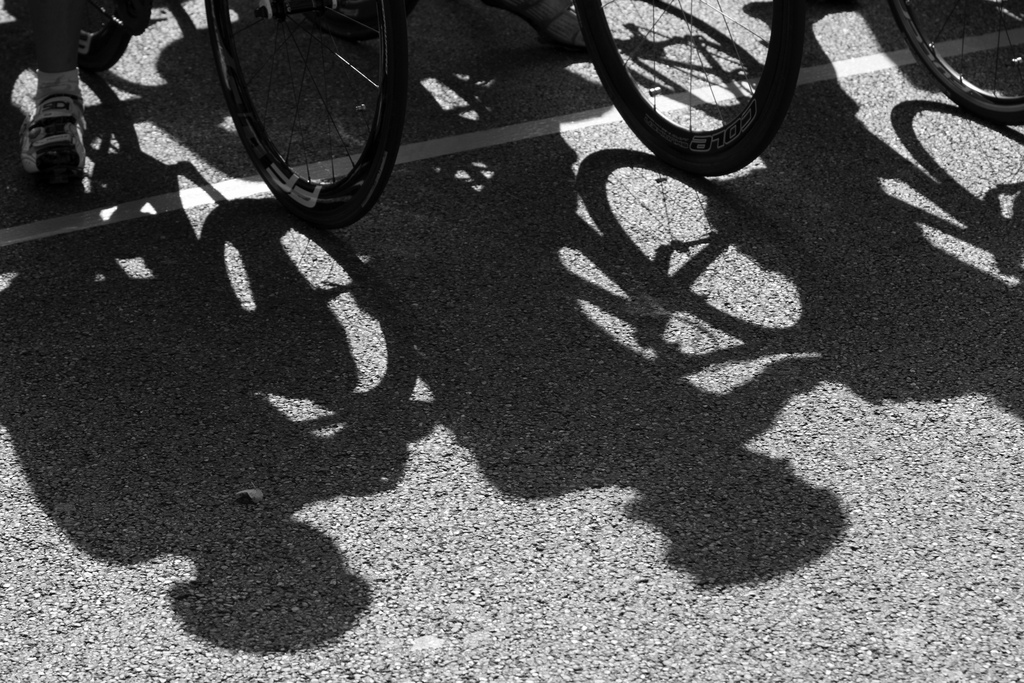
Shadows add contrast to your image

There's sooo much more with regards to composition you can think of: use flash, use backlight, starburst or triangel shapes. 

Go out there and give it a go. Don't be turned off by the autumnal weather. There's so many beautiful things and situations out there. It's up to you how you document them. 

PS Do you already follow us on Facebook? 

Friday, September 4, 2015

Tutorial / Lightroom: presets

This post is dedicated to presets. How working with presets can make your editing easier and more fun. You can make your own presets or buy/get them on the internet. Lots of photographers make and sell presets. In this tutorial we will tell you how to make presets and how to save them.

How does it work with presets, you might wonder. Well, often used actions in Lightroom can be made into a preset. For example: if you're working on a portrait shoot and you'd like to give your pictures some extra contrast and colour straight away: use a preset. Works really well when shooting tethered. Every picture that comes into Lightroom has that little bit of extra colour and contrast. 
All you have to do is make a preset that adds contrast and colour and save it. 

There are global and local presets. A global preset affects the whole image whilst local presets affect a certain part of the image. We start with making a global preset. 

Open Lightroom and open the development module. Make some adjustments in for example the basic panel
Go to Develop > New preset in the menu
 

Give the preset a name and select the options. Make sure the box 'Process Version' is also checked! Now click on Create. You can find your new preset in the preset panel on the left side.

Now you can use the preset in other pictures. Open the picture and click on the preset.
As you can see the image has more contrast now and more vibrance. 
As we mentioned before, a preset can also be used when shooting tethered. Each time you make a picture, it will be loaded into Lightroom. And Lightroom will then add contrast and vibrance. Voila. That's all there is to it in making your own global adjustment. 

But what if you buy a preset on the internet? All you have to do is save it on the right location. Copy the preset and paste it on this location:
• Mac: (user)/Library/Application Support/Adobe/Lightroom/Develop Presets
• Win: (user)/Application Data/Adobe/Lightroom/Develop Presets

You also can open the preference folder within Lightroom. 

• Mac: Ligtroom/preferences
• Win: Edit/ preferences

Click on the button "show Lightroom presets folder" 

Browse to development presets and paste it on this location.


Last but certainly not least: how about a local adjustment. 
Open a picture and make a local adjustment with either the graduated filter or the adjustment brush. 
Save it in the Effect popup menu by choosing Save current settings as a new preset.

Give your preset a name and save it

Now you've got a new local preset that you can pick up in the effect menu.

Saving a local preset that you get from the internet works pretty much the same as saving a global preset. The only difference is that you have to select the Local adjustment presets instead of the Development presets.

Go for it! Make your own presets, be it local or global and let us know how it worked out. We'd love to hear from you on our Facebook page. 


Wednesday, September 2, 2015

Tutorial / Lightroom: black and white

With summer well and truly over in this part of the world, the sun seems to have taken a leave of absence. After we posted the soft autumn colours of a very early morning, we now dedicate this post to black and white photography. Black and white (B/W) can give your picture a completely different atmosphere than a colour picture. But what picture is good for B/W? When to go to B/W? 

Take for example today. A bit of an overcast day. Now there's a good start for some B/W photography. B/W also works really well when there's plenty of shadows in your image. 

When the object of your shoot is to have great B/W images, please don't forget to shoot in colour. This might sound contradictory, but when you shoot in colour you've got all these dimensions to work with in post processing. You loose all this when you start out shooting in B/W. Next step is to load your images into Lightroom.

There's more ways than one to convert your image(s) to B/W. 

The easiest way is to desaturate the image. Yes, that does give you a B/W image, but a very meager one. I'd suggest to stay away from this method. 

Let me tell you about our most used method: 
We start editing the image in colour, highlights / shadows, blacks and whites. Sometimes a bit of contrast. The latter depends on your taste: if you prefer your B/W images to be very contrasty, go for it with the contrast slider. We prefer to have it just right, not too little, not too much. And ofcourse if needed or desired, this is the point where you do some local adjustments. 

Now is the time to go from colour to B/W. Go to the HSL/Color/B & W panel. Click on black and white and your image changes from colour to B/W. With the sliders, you can change the specific colours. This is where the use of shooting in colour comes in. For example the blue channel for the sky. You can brighten or darken it with the slider.
Here is an example of a picture from Valencia that is converted to black and white. With some local adjustements, we added some contrast: brush,radial filer and graduated filter we added contrast. 


Some people like more contrast and use the Tone Curve panel.
Within the panel you can choose between lineair, middle or strong contrast. Just go for it, to see how it works in your picture. And to see what you like best. 
So go out there, shoot some great images. In colour. Do some fab editing and use this method to go to B/W. 

Here's one final example from our good old Amsterdam days. What do you reckon? 


Monday, August 31, 2015

Basics: it's all about good preparation

Last week we wrote about Focus. I guess you can sort of see this is a logical part two. 

Before you even start shooting you should think about what you want to shoot, what you'd like to achieve with your image. 

Summer days are really long here in Sweden, so it's kinda out of office hours you have the best light for shooting both a sunrise and a sunset. As we are slowly easing into autumn, the times are getting better for getting that magical morning (and evening) light. 

So last night I set my mind to shooting a sunrise. Preparation started with: 
- checking the weather. I don't want too much clouds in my images (nor too little for that matter). 
- checking the times for the sunrise and where does the sun actually rise? Yeah, I know, in the east. But where exactly will be the best spot in my immediate surrounding to see that sunrise? Hurrah for Google, we found this great site to answer just these questions. 

With both the weather and the sunrise details checked, we planned the location: a jetty close to Tibrandshögen here on Rödön. It's alway nice to shoot close to the water to get beautiful reflections. Composition wise it's best to have a decent foreground when shooting your sunset. Use for example the stones in the water, a jetty or a human being.
And then ofcourse, I needed all my equipment (plus some more): 
  1. Camera (batteries fully charged ofcourse) 
  2. Filters (ND/ polarized)
  3. Tripod
  4. Remote control (or use the timer of your camera) to avoid camera shake
  5. Food/drinks
  6. Warm clothes
  7. Phone (to check the time)
Luckily, the weather prediction was spot on this morning at 5! 

I made sure to be at the location an hour before the actual sunrise. This way I caught the beautiful soft light of the blue hour. This blue hour is between an hour before sunrise and the actual sunrise

Blue hour is the period of twilight each morning and evening when the sun is a significant distance below the horizon and the residual, indirect sunlight takes on a predominantly blue hue. This effect is caused by the relative diffusibility of short blue wavelengths of light versus the longer red wavelengths. During the blue "hour" (typically the period is about 40 minutes in length), red light passes straight into space while blue light is scattered in the atmosphere and therefore reaches the earth's surface. 

When the sun is above the horizon it's called the Golden hour.

In photography, the golden hour (sometimes known as magic hour, especially in cinematography) is a period shortly after sunrise or before sunset during which daylight is redder and softer compared to when the Sun is higher in the sky.

With this picture you can easily understand the blue and golden hour:


And as you can probably imagine by now: it's the opposite way during the sunset.


PS Don't forget to follow us on Facebook or Twitter too!