And have you already discovered our Facebook page Humans of the Nordic Region?
Showing posts with label pixabay. Show all posts
Friday, February 17, 2017
Turn on the lights in Photoshop. (video)
See you can turn on the lights in Photoshop using the gradient tool.
Wednesday, February 8, 2017
Photoshop Quicktip, add a vignette with the marquee tool
To make a vignette with the marquee tool just follow this steps.
1. Open the image and duplicate the layer (Cmd or Ctrl J).
2. Choose the Elliptical Marquee Tool and feather it.
Now the outside is selected.
4. Go to Image > Adjustments > Brightness and contrast
1. Open the image and duplicate the layer (Cmd or Ctrl J).
2. Choose the Elliptical Marquee Tool and feather it.
The amount of feather depends on your image. But for a large image it can be set around 150px. But see what works best for your picture.
3. Make your selection and inverse it
4. Go to Image > Adjustments > Brightness and contrast
Drag the brightness slider to the left o make it darker.
Easy and fast.
Picture from pixabay
Wednesday, April 20, 2016
How to put your subject in another background in Photoshop
In this post we're moving our subject and placing it against another background.
I start with 2 pictures:
The goal is to move the girl to the other background (image 1) and make it look realistic. First of all, I've got to cut out the girl from her original background. To do this, I open the picture and use the quick selection tool (W).
I used refine edges to improve the selection and went with output as Selection. I right clicked on the selection and chose 'Layer via cut'. Don't forget to make the background layer inactive here.
I start with 2 pictures:
Open the picture of the background. Select the girl and move her to the new background using the Move tool (V). I used the free transform tool (Cmd T) to scale it.
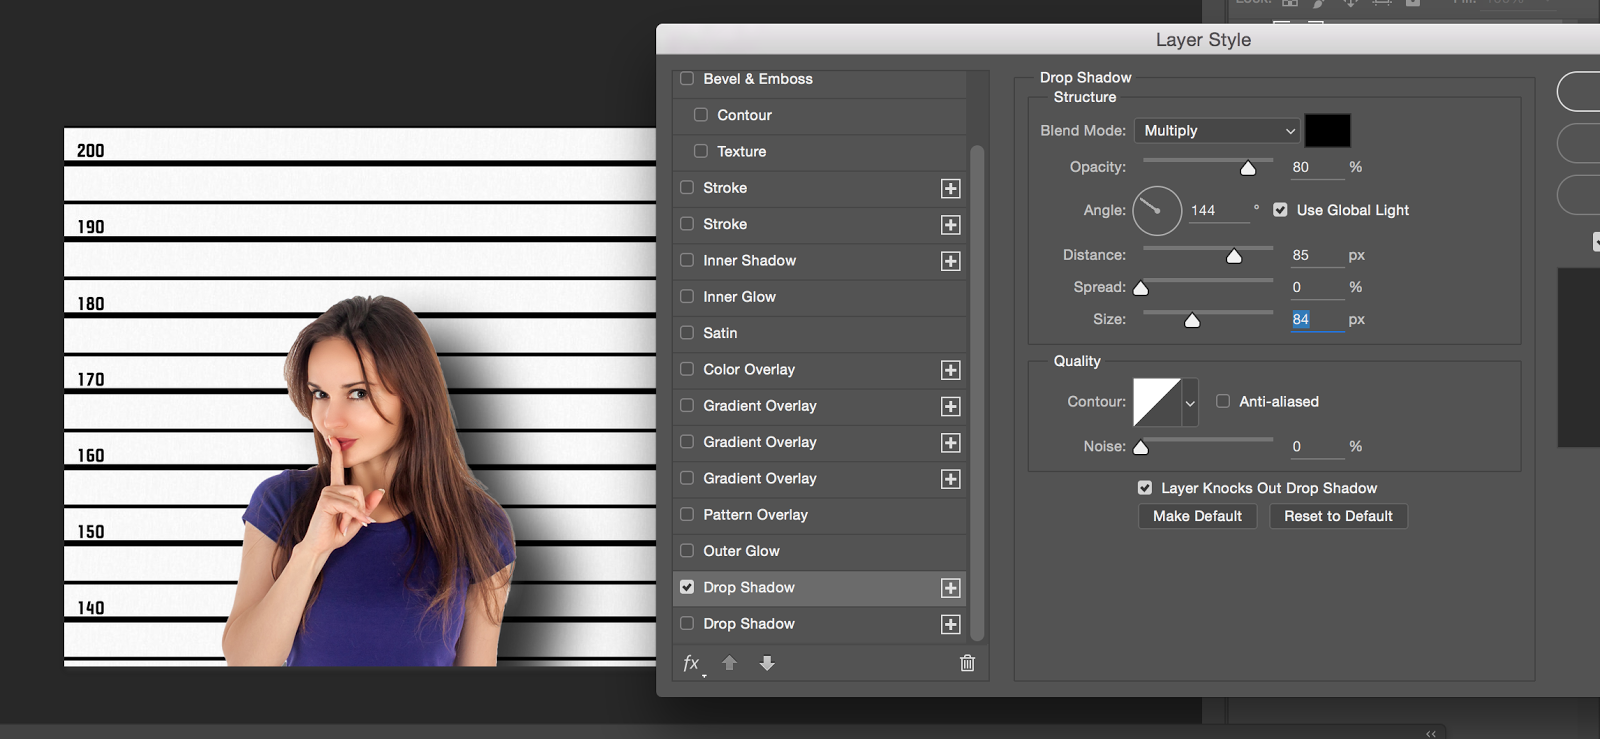
Next I created a shadow around the girl to make it more realistic. Double click on the girl in the layer panel. I chose Drop shadow.
These are the values I used for the drop shadow.
Last thing to do is to blur the edges of the selection of the girl with the blur tool. Merge the layers (Cmd E) down and add some blur around the girl.
This are the basic steps to add a subject to another background. Go on, give it a go!
By the way, the picture I used comes from pixabay.com
Sunday, December 20, 2015
Let it rain // tutorial on adding rain in Photoshop
With it being winter in this neck of the woods and with us longing for lots more snow, we posted a blog about adding snow just the other week.
This blog though is about adding rain. As it might be handy to figure out how to do that too.
Like in so many of our posts, we start with a picture from Pixabay.com
And have you already discovered our brand new Facebook page Humans of the Nordic Region?
This blog though is about adding rain. As it might be handy to figure out how to do that too.
Like in so many of our posts, we start with a picture from Pixabay.com
Now let's make it rain!
- Add a black layer
- Fill this layer with black
- Convert the layer to a smart object
- Add noise: Filter > Noise > Add Noise..
- Add Motion Blur: Filter > Blur Motion blur
- Change the blending mode to Screen
- Add Gaussian blur: Filter > Blur > Gaussian blur
Voila! The girl is now standing in a regular downpour!
In this picture I see some motion blur on the top and bottom of the picture. So I stretched this out with Free Transform (CMSD/CTRL T). Depending on your image you can add more contrast, use Blend and reduce the Opacity of the layer. Last thing you can do is to mask out some part where you don't want the rain.
And after I've done all that, this is the end result:
And have you already discovered our brand new Facebook page Humans of the Nordic Region?
Wednesday, December 9, 2015
Let it snow! Making snow in Photoshop
In the northern hemisphere it's that time of the year again... we're longing for a white white Christmas. Or actually a white tomorrow so we can start shooting some really cool snow pictures.
This post is useful for when you're in need of snow, but there's not much snow to be found nearby. In this post I'll describe how to add snow in an image.
I'm working with this picture from Pixabay.
With the Erase tool (E) you can erase snow in places where you don't want it.
Last step is to add some blur to the snow to make it look more realistic. I'll add a bit of Gaussian blur to the smaller snowflakes. Whereas I'll give the bigger snowflakes both Gaussian and motion blur.
This post is useful for when you're in need of snow, but there's not much snow to be found nearby. In this post I'll describe how to add snow in an image.
I'm working with this picture from Pixabay.
A great image in a wintery landscape, but with a bit of snowflakes falling it'll enhance the atmosphere in the image!
I'm adding the snowflakes with a brush. So first thing to do is making my own snowflake brush:
1. Open a new Document (Cmd/Ctrl I). I don't need a big document so I resized it to 500 by 500 pixels
2. I drew 2 black circles with the elliptical marquee tool
3. Then I saved it as a brush. (go to Edit > Define brush Preset and name your brush.)
4. Then I closed the document and went back to my winter picture. Yes, almost ready to make it snow! Let's not forget to change the brush: hit B and open your brush
A brush can be changed by opening the brush presets (Windows > Brush presets). First thing is to change some settings under Shape Dynamics
Then I changed the scattering settings:
And the transfer settings:
Just play around with the settings to see what works best in your image.
Now let it snow! This is the point where I started adding snow to the image. It's important to build this op in layers. The snow in the background is smaller and less visible then the snow in the foreground. So make some layers with snow:
With the Erase tool (E) you can erase snow in places where you don't want it.
Last step is to add some blur to the snow to make it look more realistic. I'll add a bit of Gaussian blur to the smaller snowflakes. Whereas I'll give the bigger snowflakes both Gaussian and motion blur.
- Start with deactivating the foreground and the mid ground layer. Go the Filter > Blur > Gaussian blur and add some blur. Check the effect it has in the image and choose your amount.
- Next step is to repeat this for the mid ground layer. So activate the layer and add Gaussian blur.
- I also added some Motion blur to those snowflakes. Go to Filter > Blur > Motion blur. Change the angle and choose an amount that works well in your image (and is to your liking)
- The last stap is to active the foreground layer and give it some Gaussian and Motion Blur.
If you want more snow you can easily copy a layer. Select the layer you want to copy and hit Ctrl or Cmd J.
You also can move the snow by using the move tool (V).
And have you already discovered our brand new Facebook page Humans of the Nordic Region?
Thursday, November 26, 2015
Great tip for portrait and glamour shots: how to create bigger eyes in Photoshop
For portrait and glamour shots it can work really well to give more attention to the eyes. Let me tell you it's very easy to do just that in Photoshop: making the eyes pop in your image.
- Select the image, in this case I used an image from Pixabay
- Pick the Lasso tool (L) and draw a line around the left eye
- Hit Ctrl or CMD J to put it on its own separate layer
- Select the background and draw a line around the right eye
- Hit Ctrl or CMD J to put it on its own (second) separate layer. Now you've got both eyes on their own layer.
- Select the left eye and hit Ctrl or Cmd T for the free transform tool. Make the eye a little bit bigger (holding Shift and Option)
- Select the right eye and repeat step 6
And voila! That's it, there's our model with slightly bigger eyes. It's a subtle change as I'm a fan of keeping it natural.
Friday, October 30, 2015
Healing brush tool
In the beginning I found Photoshop and it's limitless possibilities a bit overwhelming. But, the more I practised, the more I got in to it, the more I started to love it. Practise makes perfect they say. I'm not claiming that I'm anywhere near perfection, but I do know a heck of a lot more than way back. How did I get to this point? I practised, I watched lots of Youtube clips and tutorials from fellow photographers. And practise some more.
Take for example the spot healing brush. What does it do and how does it work?
I worked with the spot healing brush tool before. I quite liked working with it, however I wondered if there was a tool a bit more accurate. The spot healing brush tool works out the source point itself, but I wanted to be the one in control of the source point.
After watching this movie from Tutvid, I discovered the healing brush tool. Cue: practise time!
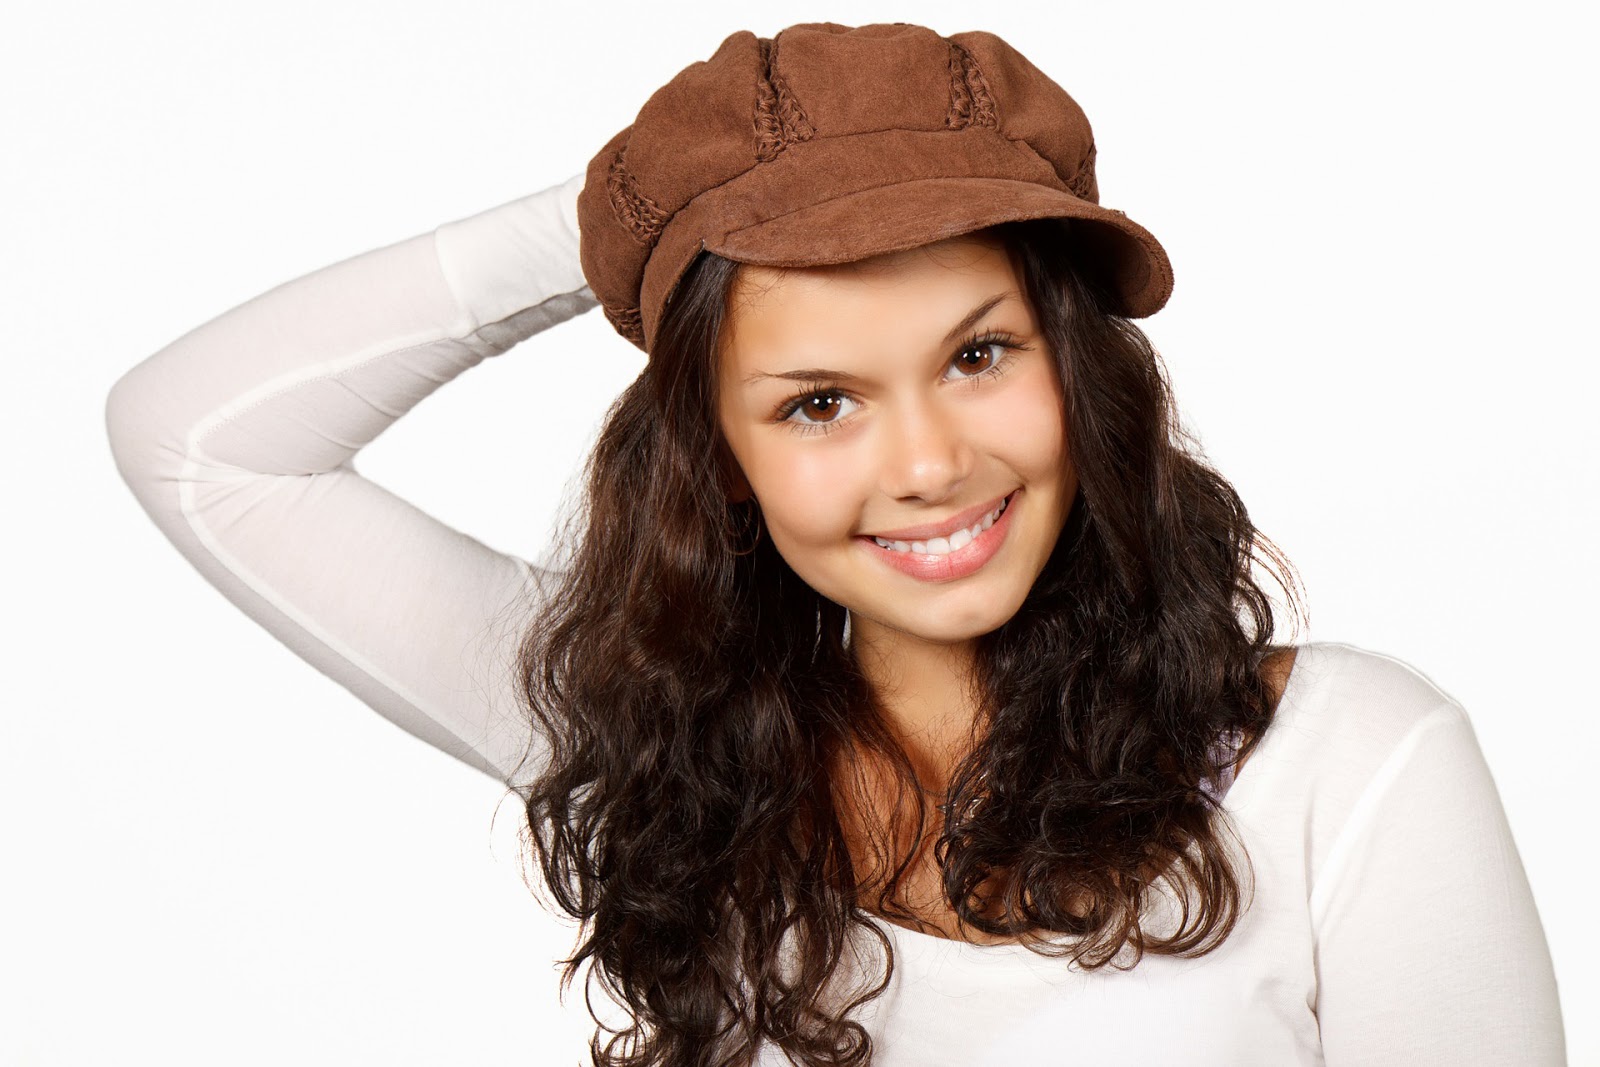
I practised with a picture I downloaded from Pixabay:
Take for example the spot healing brush. What does it do and how does it work?
The spot healing brush is the default healing tool in Photoshop and can be used to clone areas from an image and blend the pixels from the sampled area seamlessly with the target area. The basic principle is that the texture from the sample area is blended with the color and luminosity surrounding wherever you paint. The main difference between this and the standard healing brush is that the spot healing brush requires no source point.
source: http://www.photoshopforphotographers.com/
After watching this movie from Tutvid, I discovered the healing brush tool. Cue: practise time!
I practised with a picture I downloaded from Pixabay:
The healing brush can be found with the J keyboard shortcut or in the Tools menu
The principle of the healing brush is actually very simple: find a pimple or blemish and sample a piece of skin thats fits well (preferably close to the spot) and simply paint over the spot you want to 'heal'. That's it!
I prefer to keep it natural though. Not go over the top.
And you guys probably know by now that I wasn't done after that. I sharpened the image with the use of a high pass filter and made the cap a bit more colourful. And this was the result of my practising the healing brush tool:
Sometime over the next week I'll be posting a follow-up on this post. I'll be working with this picture and show you how dodge and burn can improve this picture even further.
Don't forget to follow us on Facebook or 500px. And have you already discovered our brand new Facebook page Humans of the Nordic Region!
Subscribe to:
Posts (Atom)