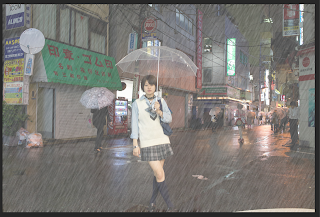
This blog though is about adding rain. As it might be handy to figure out how to do that too.
Like in so many of our posts, we start with a picture from Pixabay.com
Now let's make it rain!
- Add a black layer
- Fill this layer with black
- Convert the layer to a smart object
- Add noise: Filter > Noise > Add Noise..
- Add Motion Blur: Filter > Blur Motion blur
- Change the blending mode to Screen
- Add Gaussian blur: Filter > Blur > Gaussian blur
Voila! The girl is now standing in a regular downpour!
In this picture I see some motion blur on the top and bottom of the picture. So I stretched this out with Free Transform (CMSD/CTRL T). Depending on your image you can add more contrast, use Blend and reduce the Opacity of the layer. Last thing you can do is to mask out some part where you don't want the rain.
And after I've done all that, this is the end result:
And have you already discovered our brand new Facebook page Humans of the Nordic Region?


No comments:
Post a Comment