Showing posts with label scandinavia. Show all posts

Monday, July 25, 2016

Go where the action is

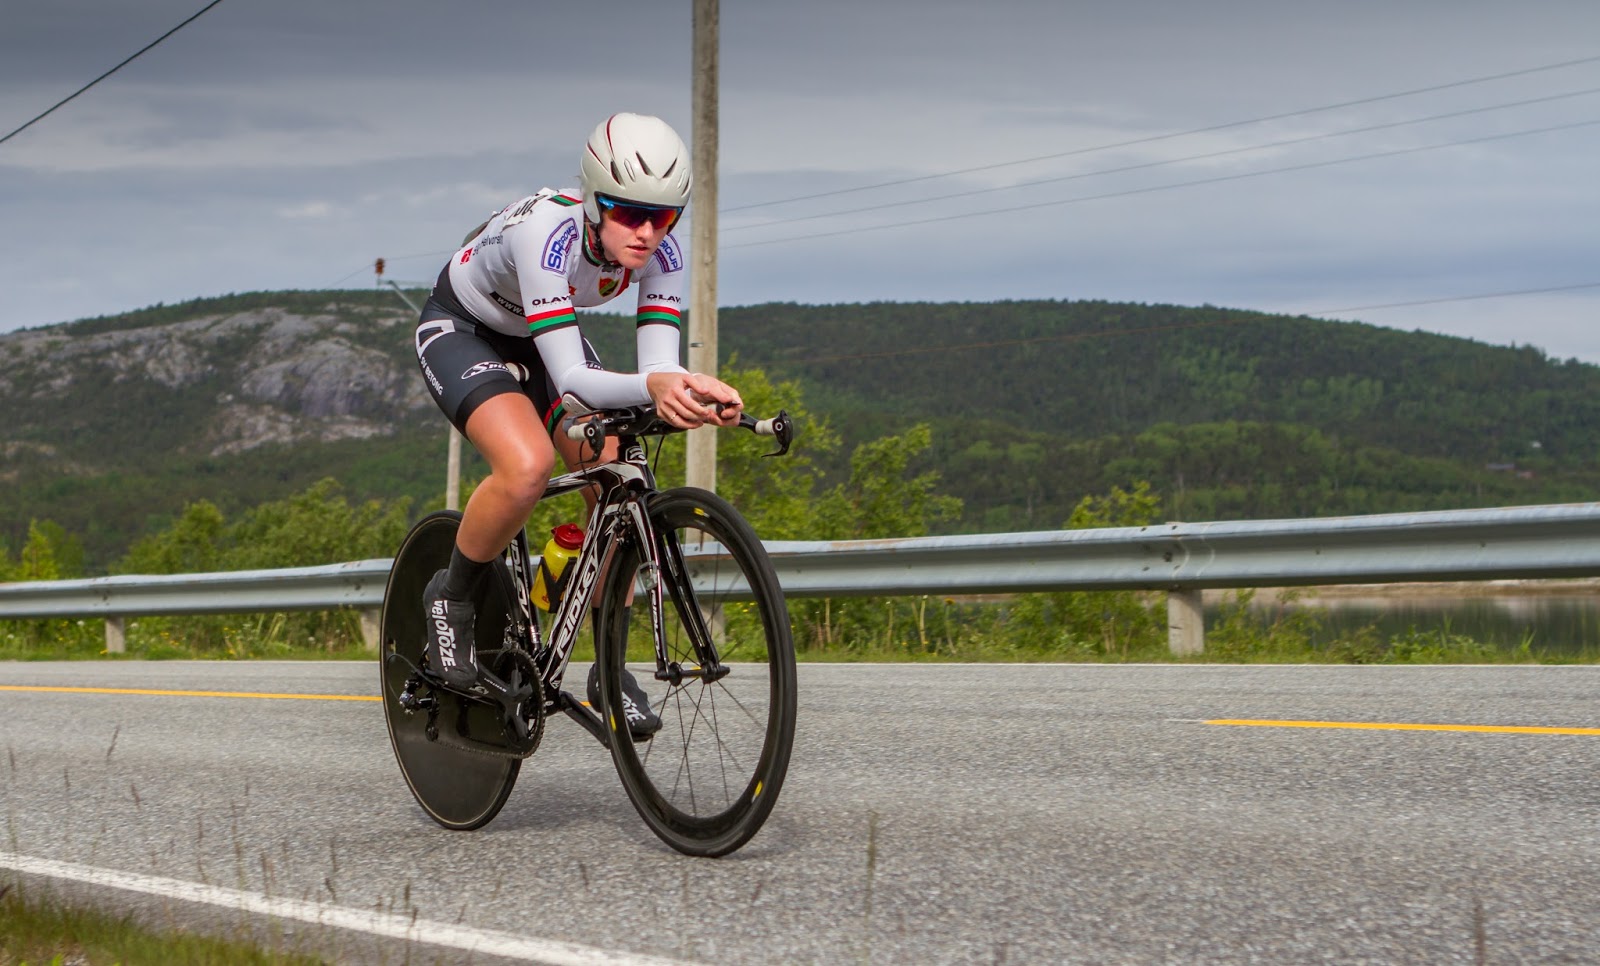
During our Norwegian roadtrip, we had the fortune of landing in the middle of the Norwegian Championships Time Trial. I guess it'll come as no surprise that we didn't hesitate to take out our cameras and to shoot some images. 

The first evening we were at the location, there was the team trial. It finished at the camping at the Saltstraumen. 

Saltstraumen is a small strait with one of the strongest tidal current in the world. It is located in the municipality of Bodø in Nordland county,Norway. It is located about 10 kilometres (6.2 mi) southeast of the town of Bodø. The narrow channel connects the outer Saltfjorden to the large Skjerstadfjorden between the islands of Straumøya and Knaplundsøya. The Saltstraumen Bridge on Norwegian County Road 17 crosses the Saltstraumen.

The last kilometer of the team time trial was challenging with crossing the bridge over the Saltstraumen to the finishline.  


The following day, our road trip took us south and we covered some of the individual time trail runs. We positioned ourselves just after one of those typical bridges. Just after the really mountainous part of the trail began. 


Road 17 is also a very popular road for bikers going to the North Cape.

Don't forget to follow us on Facebook or 500px. 


And have you already discovered our Facebook page Humans of the Nordic Region?


Monday, May 30, 2016

Hidden treasures!

Thanks to a tip, we discovered a great spot for hiking not far from home. Yesterday we hiked up Suljätten and the view was just phenomenal! Unparalleled 360 degree views! 


Take the E14 towards Järpen. Once in Järpen, drive towards Kallsedet. You'll find Suljätten by driving past Kall and towards Konäs. Mind you, it's only a small wooden sign that points towards the start of the trail, so after you've passed Konäs Camping, keep your eyes peeled for the Suljätten sign on your right. 

The Suljätten area is one of those hidden Jämtland gems. There are hiking tracks, although not all very well maintained, but that just adds to the charm. It took us about 2 hours to reach the top of Suljätten and let me tell you that the view truly is spectacular! From the top you can see Skäckerfjällen in the distance, Åreskutan, Kallsjön and the beautiful myrlandskapet. 

It's an easy and pleasant walk through the forest. When getting closer to the top, the climb gets a bit more demanding, but those views just keep getting better and better so it's just to keep going. 

From the top you have the most amazing 360 degree view over Jämtland.


To wet your appetite even further, check out this 360 degree video we shot at Suljätten.

Don't forget to follow us on Facebook or 500px. 


And have you already discovered our Facebook page Humans of the Nordic Region?

Monday, January 4, 2016

Saving a development preset in Lightroom

In Lightroom you can work with presets. A preset can be a good starting point for your post processing. You can ofcourse buy them, but why not make them yourself? I'll show you how: 

I'll start with this picture and my aim is to turn the picture B/W. 

I started out with: My actions:
  1. Adding some contrast
  2. Bringing back the highlights
  3. Opening the shadows
Then I found a good B/W point

Next is the profile correction and removing the chromatic aberration:

And then what's left is to change the image to B/W by clicking on B&W in the panel showed underneath
By dragging the sliders you can change the colors in your B/W image.

The most important global adjustments have been made now. If so desired, local adjustments can be made at this point. I used the radial and graduated filter. I didn't opt for the brush as a brush can't be saved in the preset. The image below is the result of the actions I described: 

As I'm aiming to create more pictures like this, I'm saving all my editing actions using a preset. To do so, all you need to do is opening the preset panel at the left site of the screen.
 

Now click on the + sign in the header of the panel. A new screen appears. Give your preset a name and check all the options that you want to have in your preset.

 
Click on Create to save your preset. In this case I saved it in the User Presets folder. Go to the folder and voila! There's your very own preset. 

To use your new preset, all you need to do is open another picture and use the preset to make it B/W.

Just go the preset folder and click on the preset you just created. The image is now B/W. If you want to edit some more on top of the preset, use local adjustments. Don't forget to check you radial and graduated filters and move them to correct spot in your image.


Have fun creating your own development presets! 

Don't forget to follow us on Facebook or 500px. 


And have you already discovered our brand new Facebook page Humans of the Nordic Region?


Monday, December 28, 2015

Uploading to Facebook? Here's the best way to save your pictures!

Uploading a picture to Facebook can be quite an annoying exercise. I know, I've been there. The quality of the image on Facebook is not half as good as it was in Photoshop. 

Rest assured! Something can be done about that!

Here's to go about it: start by using a width of your image that is 2048, 960 or 720. To check or change your image size go to Image > Image size


Second thing to check is if your image is in the RGB Color. Check or set in in RGB Color using Image > Mode >  RGB Color

After you've checked all that, save your file: go to File > Export > Save for web.  A new screen appears.

Choose JPEG on this screen and a quality of around 97. Be sure to tick the checkbox 'Convert to SRGB'. Check if the width of your file is correct and hit the save button.

There you have it! Now your image has the same awesome qualities on Facebook as it has in Photoshop! 

Don't forget to follow us on Facebook or 500px. 

And have you already discovered our brand new Facebook page Humans of the Nordic Region?


Wednesday, December 23, 2015

Creating a filmstrip in Photoshop

How cool is that, making your own filmstrip in Photoshop.

With creating your own filmstrip you get to learn a lot about the Free Transform Tool and Merging layers. And with a bit of warp and perspective thrown in, you get a great result!

Let's get started:
  1. Make a new file using CMD N  (Using Ctrl if you're using Windows). Make this layer black (edit > fill, choose black)
  2. Make a new layer and fill it with white
    Now you have a black and white layer
  3. Select the white layer and hit CMD T. Make the top and bottom around 75% and the left and hight about 90%
  4. Merge the two layers using CMD E
  5. Select all using CMD A, go to Edit > Copy
  6. Create or open a new file. This is the file where the filmstrip will be placed in. 
  7. Paste the first part of the filmstrip into the picture using CMD V
  8. Make a copy of the layer and move it next to the other layer
  9. Merge layer 1 and layer 1 copy using CMD E. Duplicate the new merged layer using CMD J. Move it next to the other layer. Next is merging the two layers again. And your basic filmstrip is ready. 
  10. The next step is to remove the white in the filmstrip. Select the white parts with the Magic Wand Tool (W) and hit delete. Hit CMD D to deselect the selection.
  11. Next is to create the holes at the top and bottom of the filmstrip. Hit E for the eraser tool and choose a square brush. Make one hole at the beginning, hold down the shift tool and make a hole at the end of the filmstrip. Now the upper part is ready. Do the same for the bottom part of the filmstrip. 
    Next step is to put pictures into the filmstrip. 


  12. Open a picture and copy it into the filmstrip. Scale it using CMD T. To get the picture behind the filmstrip, simply move the layer with the picture underneath the filmstrip layer.
  13. Add the other pictures into the filmstrip and scale them down.
    Next is to merge all layers. except the background layer. Select those layers and hit CMD E.
  14. There you have it! Your basic filmstrip with your own pictures is done!

    But it does look a bit flat, right? You want to give it a bit more dynamics by doing this: . Go to Edit > Transform > Warp and choose Flag
    A little less boring, right? 

    More depth can be created by using Edit > Transform > Perspective. Make the right side of the filmstrip smaller and the left side bigger.

    With CDM T and/or adding more perspective you can totally create the filmstrip the way you'd like to have it.
  15. One more thing though: to make it look real, it's a great idea to add some shadow. First make a new empty layer, grab a soft brush and make a black line 
  16. Using Perspective you can give the line the correct size
  17. Scale and move it using CMD T 
  18. Move the layer of the shadow under the filmstrip layer. Now the shadow is behind the filmstrip. If your shadow is too strong, reduce the Opacity of the layer. 
Voila! You've now created a really cool filmstrip in Photoshop.

Here's another filmstrip I made just the other day 


Don't forget to follow us on Facebook or 500px. 


And have you already discovered our brand new Facebook page Humans of the Nordic Region?