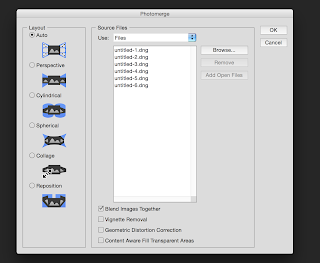
This blog though is about creating panoramas in Photoshop instead of in Lightroom.
- Open Photoshop and choose File > Automate > Photomerge
- Choose your pictures for the panorama
Photoshop will now blend the images. The result is a panorama. In the layer panel you can see the images with a layer mask. You can now edit your picture. If you just want to flatten the images use CMD/Ctrl Shift E.)
Another way is to start in Lightroom:
- Import all the images for your panorama into Lightroom
- Select all your images and right click and choose Edit in > Merge to Panorama in Photoshop or in the menu Photo > Edit in .....
- So now you'll get the import dialogue in Photoshop. Choose Auto and click OK
I've flattened the image (Layer > Flatten image) and filled the transparant parts in the picture with the Content Aware Fill.
You can do this by selecting the transparant part with the Magic Wand Tool and choose Edit > Fill, choose content aware and check if the Content Awere Fill did its job.
You can do this by selecting the transparant part with the Magic Wand Tool and choose Edit > Fill, choose content aware and check if the Content Awere Fill did its job.
Don't forget to save the image. The great thing with this method is that the panorama will be reimported into Lightroom.


No comments:
Post a Comment