This post is about another one of those fun experiments: using textures and blending them in Photoshop.
Let's take for example this picture:
I took this picture during a photo workshop . It's an OK picture, but for the purpose of this tutorial I'm gonna play around with textures a bit. Using Google it's easy to find some free textures:
The issue with these is that more often than not, these are pretty small files to work with. And when you're using the picture for commercial purposes, there might just be an issue with copyright. You can ofcourse also buy textures online. For example Serge Ramelli has a bundle with some really great textures.
Then again, why not have some fun with creating your own bundle of textures? Grab your camera and look around. I'm sure there's some pretty great textures to be found around you, both inside and outside. And there's the advantage that these are big files with high resolution.
So I took this shot right outside our frontdoor. I'll be using this shot in this tutorial.
How to incorporate the texture into your image: them?
- Open a picture in Photoshop
- Open the texture in Photoshop
- Move the texture with the move tool into your picture. You now have a picture with two layers.
- When both layers are active, you will just see the texture.
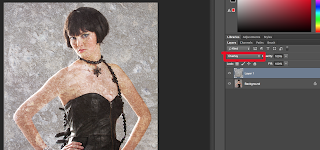
- Now change your blending mode to, for example, overlay. But you can also try Soft light or another blending mode. Just choose one you like.
- The part of the picture where you don't want to have the effect of the texture should be masked out. Add a mask and paint with a black brush on the part you don't want to have the effect of the layer
By unlinking the texture with the photo (by clicking on the chain) you are able to move the texture into another position.
Don't forget to follow us on Facebook or 500px.
Bear in mind that you have to make sure to select the texture when you move it
You can add more then one Texture and also use different blending modes. You also can reduce the Opacity of the layer when you think the effect of the layer is too strong.
I added a second layer and added a layer mask and voila, this is the end result:


No comments:
Post a Comment